How to use Gimlet Stack 
In this tutorial, you will install
- the Nginx ingress controller
- and an observability stack
- featuring Grafana for dashboards
- Prometheus for metrics
- and Loki for logs
All backed by a git repository with a self-containing gitops automation.
Prerequisites
You need to have a running Kubernetes cluster, and you need to be able to access it with
kubectl.
If you don't have one, we recommend using k3d on your laptop. If you do so, make sure not to install the built-in ingress controller:k3d cluster create my-cluster --k3s-server-arg '--no-deploy=traefik'You need to have a free GitHub account or any other git provider that you know well enough to translate the Github configuration instructions in this guide to the provider of your choice.
One other thing that you will need for GitOps is a git repository. We will create that next.
Let's start by creating a git repository
Create a private git repository on Github. This is where you will store the infrastructure configuration manifests of your stack. k8s-stack could be a suitable name for it.

Now that you have a GitOps repository, let's bootstrap the GitOps deployment cycle.
Bootstrap the GitOps automation
In GitOps, instead of applying Helm charts and kubernetes manifests directly to the cluster, you write them to a git repository. The GitOps controller will be the one deploying them on the cluster based on changes in the repository.
The GitOps controller is a control loop that monitors the state of the GitOps repository and applies any new changes to the cluster.
With this structure, your deployment process gets a set of nice properties:
- a comprehensive audit log of your configuration changes
- a familiar toolchain - git - as the primary means to manage your infrastructure
- and finally, the GitOps control loop is in a better position to recover from errors than CI jobs and homegrown automation scripts
In this tutorial, we are going to use Flux V2 as the GitOps controller and Gimlet Stack to bootstrap it.
Install Gimlet Stack
Fetch Gimlet Stack and install it with the following commands:
curl -L https://github.com/gimlet-io/gimlet-stack/releases/download/v0.3.5/stack-$(uname)-$(uname -m) -o stack
chmod +x stack
sudo mv ./stack /usr/local/bin/stack
stack --version
Clone your GitOps repository and bootstrap GitOps
Now, clone the GitOps repository you just created on GitHub, and place the GitOps controller yaml files in it with the stack bootstrap command.
Make sure to change the repository name to match the one you created earlier.
git clone git@github.com:laszlocph/k8s-stack.git

cd k8s-stack

stack bootstrap \
  --single-env \
  --gitops-repo-url git@github.com:laszlocph/k8s-stack.git
You should see a similar output to this:
⏳ Generating manifests
⏳ Generating deploy key
✔️ GitOps configuration written to k8s-stack/flux

👉 1) Push the configuration to git
👉 2) Add the following deploy key to your Git provider

ssh-rsa AAAAB3NzaC1yc2EAAAADAQABAAACAQC1593b2v[...]

👉 3) Apply the gitops manifests on the cluster to start the gitops loop:

kubectl apply -f k8s-stack/flux/flux.yaml
kubectl apply -f k8s-stack/flux/deploy-key.yaml
kubectl wait --for condition=established --timeout=60s crd/gitrepositories.source.toolkit.fluxcd.io
kubectl wait --for condition=established --timeout=60s crd/kustomizations.kustomize.toolkit.fluxcd.io
kubectl apply -f k8s-stack/flux/gitops-repo.yaml

         Happy Gitopsing🎊
Let's follow Gimlet Stack's instructions.
Authorize Flux to fetch your GitOps repository
The stack bootstrap command made a commit to the local copy of the GitOps repository with the gitops controller's deployment manifests.
Let's push that now to origin main.
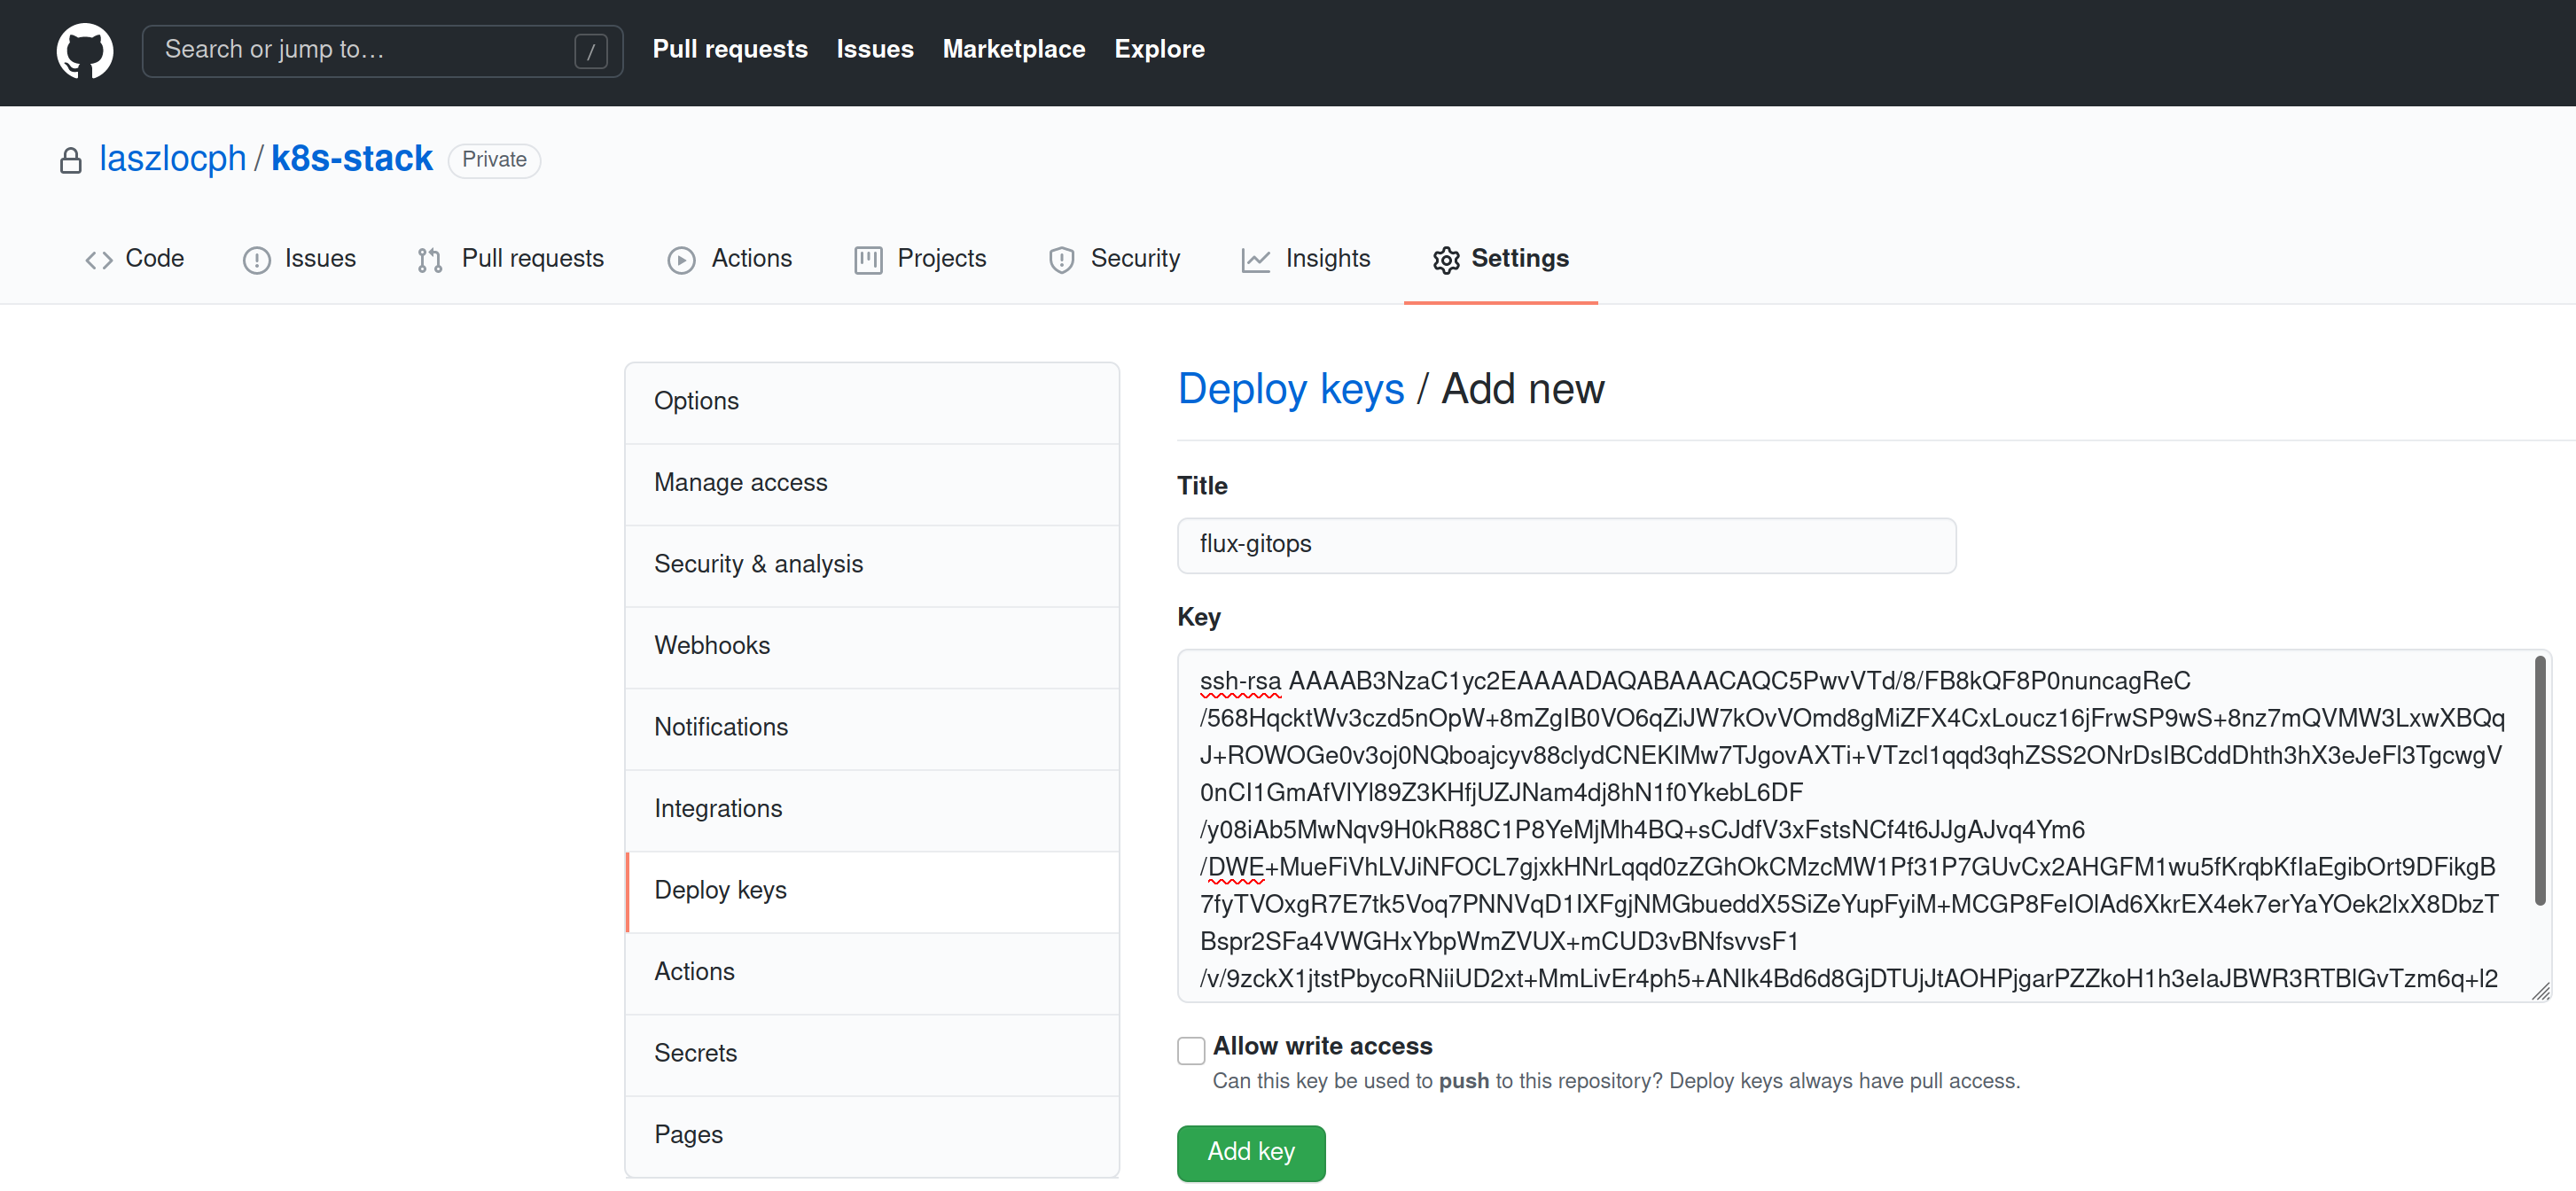
Before you apply the recently written manifests to your Kubernetes cluster, authorize Flux to fetch the contents from Github by creating a read-only deploy key in your GitOps repository.
- Open GitHub, navigate to your repository, and under Settings > Deploy keys, click on Add deploy key
- Paste the ssh-rsa key from step 2) of the
stack bootstrapoutput as a key.flux-gitopscan be an appropriate name for it - Make sure to leave the Allow write access checkbox unchecked
After all these steps, it's time to deploy Flux and start the GitOps loop.
Let's close the loop and start the GitOps deployment cycle
After granting access to Flux to read the GitOps repository, there is nothing else to set up. We can get to deploying Flux and inspecting the GitOps deployment cycle in action.
Apply the GitOps controller manifests to the cluster from step 3) of the stack bootstrap output. As a recap, these steps will get Flux deployed:
kubectl apply -f k8s-stack/flux/flux.yaml
kubectl apply -f k8s-stack/flux/deploy-key.yaml
kubectl wait --for condition=established --timeout=60s crd/gitrepositories.source.toolkit.fluxcd.io
kubectl wait --for condition=established --timeout=60s crd/kustomizations.kustomize.toolkit.fluxcd.io
kubectl apply -f k8s-stack/flux/gitops-repo.yaml
Once the pods are started, you can verify the GitOps deployment cycle in the Flux logs. If everything works as intended, you should see Reconciliation finished messages popping up periodically.
kubectl logs -n flux-system -f deploy/source-controller
...
<{"level":"info","ts":"2021-01-19T10:07:25.368Z","logger":"controller.gitrepository","msg":"Reconciliation finished in 1.413640057s, next run in 15s","reconciler group":"source.toolkit.fluxcd.io","reconciler kind":"GitRepository","name":"gitops-repo","namespace":"flux-system"}
<{"level":"info","ts":"2021-01-19T10:07:25.368Z","logger":"controller.gitrepository","msg":"Reconciliation finished in 1.413640057s, next run in 15s","reconciler group":"source.toolkit.fluxcd.io","reconciler kind":"GitRepository","name":"gitops-repo","namespace":"flux-system"}
Congratulations, now you have a working GitOps setup!
Let the fun begin, configure your stack
But GitOps is only as fun as the applications you are deploying with it. Let's configure the stack components.
Run stack configure and enable Nginx, Prometheus, and Loki on the UI:

Once you enabled these components, write the configuration with the red Close tab & Write values button.
This will not just write the stack configuration to the console, it will also write it into the stack.yaml file which holds the complete configuration of your stack.
➜ k8s-stack git:(master) ✗ stack configure
👩💻 Configure on http://127.0.0.1:24259
👩💻 Close the browser when you are done
Browser opened
Browser closed
📁 Generating values..
---
stack:
repository: https://github.com/gimlet-io/gimlet-stack-reference.git
config:
loki:
enabled: true
nginx:
enabled: true
host: laszlo.cloud
Should you have made a mistake, just run stack configure again. It will read the stack configuration from the stack.yaml, and you can reconfigure it.
Generate Kubernetes manifests from your stack and deploy them
The only thing left is to generate manifests from the stack.yaml file that Kubernetes can interpret.
For that, run stack generate and verify the files that have been generated.
➜  k8s-stack git:(master) ✗ git status
On branch master
Your branch is based on 'origin/master', but the upstream is gone.
  (use "git branch --unset-upstream" to fixup)

Untracked files:
  (use "git add <file>..." to include in what will be committed)
        examples/
        helm-releases/
        helm-repositories/
        manifests/
        stack.yaml
Add them and push them to origin main.
Once you pushed the generated manifests and the stack.yaml to git, the GitOps workflow deploys it on your cluster.
Verify the installed stack
➜  kubectl get helmreleases.helm.toolkit.fluxcd.io -n infrastructure
NAME             READY   STATUS                             AGE
ingress-nginx    True    Release reconciliation succeeded   4m29s
prometheus       True    Release reconciliation succeeded   4m29s
loki             True    Release reconciliation succeeded   4m29s
grafana          True    Release reconciliation succeeded   2m24s
➜  kubectl get pods -n infrastructure
NAME                                             READY   STATUS    RESTARTS   AGE
prometheus-node-exporter-5pg5b                   1/1     Running   0          5m23s
prometheus-kube-state-metrics-6bfcd6f648-fdrbk   1/1     Running   0          5m23s
svclb-ingress-nginx-controller-xbznc             2/2     Running   0          5m1s
loki-promtail-6m45c                              1/1     Running   0          5m23s
ingress-nginx-controller-569b78f477-pdssw        1/1     Running   0          5m1s
prometheus-server-5c7648b4dc-wn7lp               2/2     Running   0          5m23s
loki-0                                           1/1     Running   0          5m23s
grafana-7b76796ff8-64w65                         2/2     Running   0          3m19s
Should you not see the HelmReleases or pods, it is good practice to check the gitops controller logs:
kubectl logs -n flux-system -f deploy/source-controller
and
kubectl logs -n flux-system -f deploy/kustomize-controller
To get started on the ingress and on the observability stack, refer to the component description in stack configure.
Next steps
Now that you have a running stack, see how can you operate it in Updating stacks.